
Don’t toss that worn-out backpack! This DIY guide shows how to stitch a backpack, empowering beginners to repair tears, reinforce seams, and extend their gear’s life. Learn essential tools, preparation steps, and stitching techniques to make your backpack durable and adventure-ready, saving money and the environment. Discover how simple it is to bring your favorite gear back to life with just a few basic supplies and a bit of patience.
Oh, the trusty backpack! It’s been with you through thick and thin, carrying your books, your gear, your snacks, and countless memories. But let’s be honest, even the most robust backpacks eventually show signs of wear and tear. A frayed seam here, a small tear there, or maybe a strap starting to come loose. Before you relegate your loyal companion to the donation pile or, worse, the landfill, consider a much more rewarding option: repairing it yourself!
Check the latest prices and available rooms before they sell out.
Learning how to stitch a backpack isn’t just about fixing a hole; it’s about extending the life of a beloved item, saving money, and even picking up a new, incredibly useful skill. Many people shy away from DIY repairs, assuming they need to be a master tailor. But I promise you, with a few basic tools, a little patience, and this beginner-friendly guide, you can confidently tackle most common backpack repairs. It’s a surprisingly satisfying process that connects you more deeply with your gear.
This comprehensive guide will walk you through everything you need to know to stitch a backpack, from gathering your materials to mastering essential stitches and adding those professional finishing touches. We’ll break down complex tasks into simple, actionable steps, ensuring that even if you’ve never held a needle before, you’ll feel empowered to bring your backpack back to life. So, grab your damaged backpack, and let’s get ready to make it adventure-ready once again!
Key Takeaways
- Embrace DIY Repair: Repairing your backpack saves money, reduces waste, and allows you to preserve sentimental items while learning a valuable new skill.
- Gather the Right Tools: Essential items include heavy-duty needles, strong thread (nylon/polyester), sharp scissors, a thimble, and potentially fabric patches or an awl for thicker materials.
- Proper Preparation is Crucial: Always clean your backpack thoroughly before starting. Assess the damage carefully and trim any frayed edges to ensure a neat, durable repair.
- Master Basic Stitching Techniques: Learn the running stitch and backstitch for minor repairs, and the robust saddle stitch for high-stress areas like straps and seams.
- Reinforce High-Stress Points: Use techniques like box stitching or zigzag stitches around straps, handles, and other areas that endure significant pull and weight for enhanced durability.
- Patience and Practice Pay Off: Take your time with each stitch, especially when learning. Practice on scrap fabric first, and remember that a sturdy repair is more important than a perfectly invisible one.
- Finish Strong: Secure your stitches with strong knots and consider using fabric glue or a lighter to melt synthetic thread ends for extra security and to prevent unraveling.
Quick Answers to Common Questions
What kind of needle is best for backpack repair?
Heavy-duty sewing needles, upholstery needles (especially curved ones), or leather needles are best for penetrating tough backpack fabrics.
What type of thread should I use to stitch a backpack?
Always use strong, durable synthetic threads like nylon or polyester upholstery thread, or waxed thread for maximum strength and resistance to the elements.
Do I need a patch for every tear?
No, small tears or unraveling seams can often be mended directly with strong stitches like a backstitch. Patches are typically needed for larger holes or thin, weakened fabric areas.
How can I make my backpack stitches super strong?
Use a saddle stitch for critical areas, and reinforce high-stress points like strap attachments with box stitching. Always pull your stitches tight and knot them securely.
Is it okay to use fabric glue when repairing my backpack?
Yes, flexible fabric glue can be used to temporarily hold patches in place before stitching, or to seal knot ends and frayed edges for extra security and waterproofing.
Find the Best Accommodation Deals
Compare prices from multiple booking platforms and find the best option for your stay.
Compare Hotel Prices
📑 Table of Contents
Why Repair Your Backpack? The Benefits of DIY Stitching
Before we dive into the nitty-gritty of how to stitch a backpack, let’s talk about why this skill is so valuable. There are numerous compelling reasons to choose repair over replacement, benefiting both your wallet and the planet.
Save Money and Resources
New backpacks, especially good quality ones, can be expensive. A simple tear or a loose seam doesn’t necessarily mean your backpack is beyond saving. By learning to stitch a backpack yourself, you can fix minor issues quickly and affordably. You’ll save the cost of a new bag and avoid the potential expense of professional repair services. Plus, extending the life of your existing gear is a fantastic way to reduce your consumption and environmental footprint, keeping perfectly good items out of landfills.
Find the Best Accommodation Deals
Compare prices from multiple booking platforms and discover the best stay options available.
⭐ Trusted by thousands of travelers
💰 Budget to luxury options available
Sentimental Value and Customization
Some backpacks are more than just bags; they hold memories of trips, school years, or special gifts. Tossing out a backpack with sentimental value can be tough. DIY repair allows you to preserve these cherished items, giving them a new lease on life. Furthermore, a repair can be an opportunity for a bit of customization. You might choose a patch that adds character or a contrasting thread color that makes your repair a unique design feature. It’s a personal touch that store-bought replacements can’t offer.
Learning a Valuable Skill
Mastering how to stitch a backpack is a gateway to a whole new world of practical skills. Once you’re comfortable with basic hand-stitching techniques, you’ll find yourself capable of mending other items, from clothing to tents to gear bags. It’s a practical skill that builds confidence and self-sufficiency, reducing your reliance on disposable items and giving you a sense of accomplishment every time you successfully mend something.
Essential Tools and Materials for Backpack Stitching
Having the right tools is half the battle when you want to stitch a backpack effectively. Don’t worry, you don’t need a full sewing kit; just a few specialized items will make your repair much easier and more durable.
Best Stay Deals Available
Compare prices across top booking platforms and find the best deal for your stay.
Check Available Rooms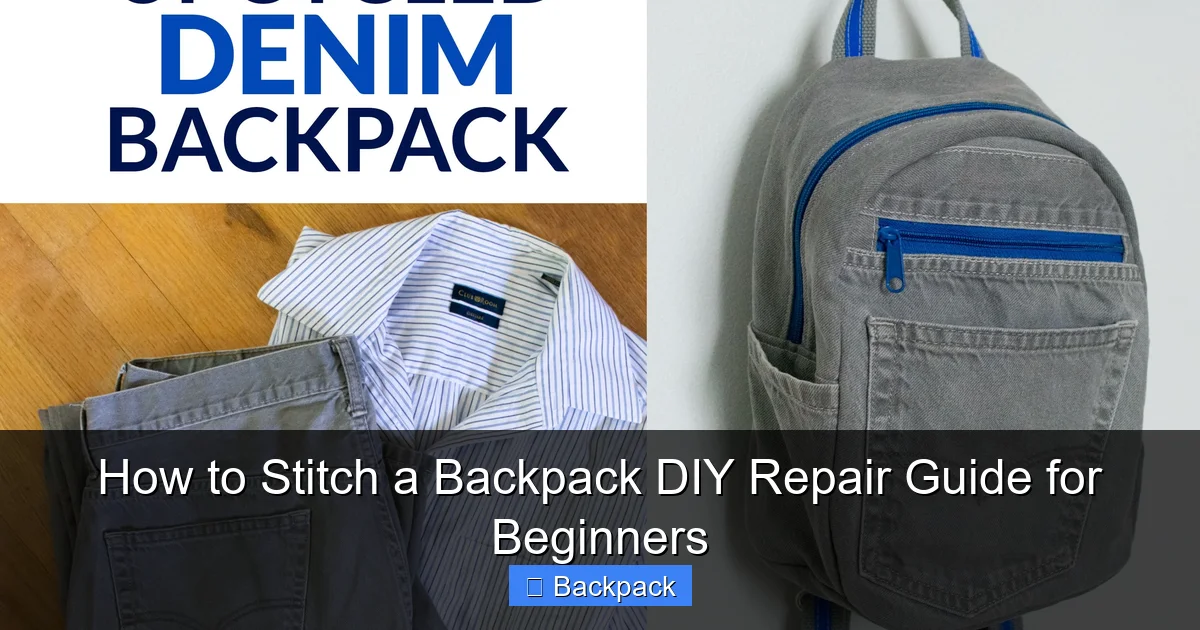
Visual guide about How to Stitch a Backpack DIY Repair Guide for Beginners
Image source: scratchandstitch.com
Needles: What Kind to Use?
Forget your grandmother’s fine embroidery needles. For backpack fabrics, you need strength and sharpness. Look for:
- Heavy-duty sewing needles: These are thicker and stronger than regular needles.
- Upholstery needles: Often sold in assortments, these include curved needles which are incredibly useful for getting into tight spots or stitching around existing seams without taking the backpack completely apart.
- Leather needles (or “triangle point”): If your backpack has very thick material or leather accents, these needles have a sharp, cutting point that can penetrate tough fabrics more easily.
Make sure your needles are sharp; dull needles will struggle and might damage the fabric further.
Thread: The Stronger, The Better
The thread you choose is crucial for a lasting repair. Regular cotton thread simply won’t cut it for a backpack. Opt for:
- Nylon or Polyester Upholstery Thread: These synthetic threads are incredibly strong, resistant to rot, mildew, and UV rays, making them ideal for outdoor gear.
- Waxed Thread: Often used for leatherwork, waxed thread is pre-coated, which makes it stronger, more resistant to fraying, and easier to pull through tough fabrics without tangling. It’s a fantastic choice when you need to stitch a backpack for maximum durability.
Match the thread color as closely as possible to your backpack fabric for an invisible repair, or choose a contrasting color for a bold, intentional look.
Fabric Patches and Adhesives
For larger tears or holes, especially in high-wear areas, a patch is essential.
- Fabric Patches: Look for patch material that matches your backpack’s fabric type and thickness (e.g., Cordura, nylon). Old denim, canvas, or even fabric from an old backpack can work.
- Fabric Adhesives/Glue: A strong, flexible fabric glue (like Seam Grip, AquaSeal, or Gorilla Glue Fabric Glue) can be used to hold patches in place before stitching, or to seal frayed edges and reinforce stitches after the repair.
Other Handy Tools
- Sharp Scissors: For clean cuts on thread and fabric.
- Thimble: Essential for pushing thick needles through dense fabrics without hurting your finger. Don’t skip this!
- Awl: A pointed tool used to create pilot holes in very thick or tough materials before stitching.
- Small Pliers: For gripping and pulling needles through tough fabric when your fingers aren’t strong enough.
- Seam Ripper: Handy for carefully undoing old stitches or mistakes without damaging the fabric.
- Clamps or Binder Clips: To hold fabric layers or patches in place while you stitch.
- Lighter: For carefully melting the ends of synthetic thread (nylon/polyester) to prevent fraying (use with caution!).
Preparing Your Backpack for Stitching Success
Proper preparation is key to a durable and clean repair. Don’t rush this step; it will save you headaches later on when you stitch a backpack.
Visual guide about How to Stitch a Backpack DIY Repair Guide for Beginners
Image source: sewing-beginners.com
Cleanliness is Key
Before you even think about stitching, make sure your backpack is clean. Dirt, grime, and oils can make stitching difficult and prevent adhesives from sticking properly. If possible, hand wash the affected area, or the entire backpack, according to its care instructions. Allow it to dry completely before proceeding.
Assess the Damage
Take a good, close look at the area you need to repair.
- Is it a simple seam coming undone?
- Is it a small tear in the fabric?
- Is there a larger hole that will require a patch?
- Are there multiple areas needing attention?
Understanding the extent and type of damage will help you choose the right repair method and materials. Look for underlying weaknesses too; sometimes a small tear indicates that the surrounding fabric is stressed and might need reinforcement.
Trimming Frayed Edges
For tears or holes, use your sharp scissors to carefully trim any excessively frayed or loose threads around the damaged area. This creates a cleaner edge to work with and prevents further unraveling. Be conservative; only cut what’s truly necessary.
Patching Larger Holes
If you have a significant hole or a very thin, weakened area, you’ll need a patch.
- Cut your patch: Make sure it’s larger than the hole, extending at least an inch beyond all edges of the damage. Round the corners of your patch to prevent them from snagging and lifting later.
- Position the patch: You can apply the patch to the inside or outside of the backpack. For aesthetic purposes, an inside patch is often preferred. For maximum durability, especially on high-wear areas, an outside patch (or even both, sandwiching the original fabric) might be better.
- Secure the patch: Use fabric glue to temporarily adhere the patch in place. Allow the glue to dry completely according to the manufacturer’s instructions. Alternatively, use binder clips or pins to hold it firmly in position before you stitch a backpack.
Once the patch is secured, you’re ready to start stitching around its edges.
Step-by-Step Stitching Techniques for Backpack Repair
Now for the main event: learning how to stitch a backpack with confidence! We’ll cover a few essential stitches that will handle most repair situations.
Basic Running Stitch and Backstitch
These are fundamental hand-sewing stitches.
- Running Stitch: This is a simple, quick stitch used for gathering or light seams. You bring the needle up through the fabric, then down, then up again a short distance away, creating a dashed line. It’s not the strongest for backpacks but can be used for initial tacking or very low-stress areas.
- Backstitch: This is much stronger and forms a continuous, solid line of stitching on the top. It’s perfect for reinforcing seams or mending small tears.
- Bring your needle up through the fabric from the back (point A).
- Go down a short distance forward (point B).
- Come up again a short distance *further* forward (point C).
- Now, go back down into the same hole as your previous stitch (point B).
- Repeat: come up at D, go back down into C.
This creates an overlapping stitch that is very durable. Use a thimble and pliers as needed when working with tough fabrics.
The Saddle Stitch (or Two-Needle Stitch)
This is arguably the strongest hand stitch and is highly recommended when you stitch a backpack, especially for critical areas like straps, handles, or heavy-duty seams. It requires two needles and ensures that if one stitch breaks, the entire seam won’t unravel.
- Thread two needles, one on each end of a single length of waxed thread.
- Start by pushing one needle through the fabric from one side. Pull it through until the middle of your thread length is at this starting point.
- Now, take the second needle and push it through the same hole from the opposite side. You should have both needles on one side of the fabric, with the thread forming an “X” or “V” in the hole.
- For each subsequent stitch, create a new hole (with an awl if necessary) a short distance from the last.
- Pass one needle through this new hole from one side.
- Then pass the *other* needle through the *same new hole* from the opposite side.
- Pull both threads tight after each stitch to create a secure, locked seam.
This stitch creates a beautiful, incredibly strong seam that looks the same on both sides.
Box Stitching and Zigzag Stitch
- Box Stitching (for Straps and Webbing): When reattaching a strap or reinforcing a high-stress connection point, a simple straight stitch isn’t enough. Box stitching involves sewing a square or rectangle, and then adding an ‘X’ shape through the middle of the box. This distributes stress over a larger area, making the attachment much stronger. You can use a backstitch to create the box and the ‘X’.
- Zigzag Stitch (Reinforcement): While traditionally a machine stitch, you can mimic a hand-stitched zigzag for raw edges or to secure a patch more broadly. Stitch diagonally from one side of the edge to the other, then back diagonally in the opposite direction, moving forward slightly with each pair of stitches. This is good for preventing fraying.
Reinforcing High-Stress Areas
When you stitch a backpack, pay special attention to areas that take a lot of strain:
- Strap Attachments: Always use box stitching for shoulder straps and grab handles.
- Bottom Seams: These often bear the weight. Double-stitching with a backstitch or saddle stitch is a good idea.
- Zipper Ends: These get a lot of tugging. Reinforce the fabric around zipper stops with dense backstitching.
Dealing with Zippers and Mesh Pockets
These areas can be tricky.
- Zipper Repair: If the fabric around the zipper has torn, patch and stitch it as close to the zipper teeth as possible using a strong backstitch. If the zipper itself is broken, it’s often best to seek professional repair or consider a complete zipper replacement, which is a more advanced task.
- Mesh Pockets: Mesh is fragile. For small holes, you can carefully sew the edges together using a fine needle and thread, mimicking the existing mesh pattern. For larger tears, a patch of similar mesh fabric (or even a thin, durable nylon) can be stitched over the hole. Use a running stitch or small backstitches, being careful not to pull too tight and further tear the mesh.
Tips for a Durable and Professional-Looking Repair
You’re almost a pro at how to stitch a backpack! Here are some final tips to ensure your repair lasts and looks great.
Practice Makes Perfect
Don’t expect your first repair to look factory-perfect. Grab some scrap fabric, ideally something similar to your backpack material, and practice your stitches. Get a feel for the needle, thread, and tension. The more you practice, the neater and stronger your stitches will become.
Don’t Rush It
Stitching, especially by hand, is not a race. Take your time with each stitch. Rushing can lead to uneven stitches, tangled thread, or even mistakes that require you to start over. Put on some music, relax, and enjoy the meditative process of creating something with your hands.
Use Thimbles and Pliers
We mentioned them earlier, but they bear repeating. A thimble will protect your finger from repeated needle pushes, which is especially important with thick fabrics. Small pliers (like needle-nose pliers) will be your best friend for gripping and pulling needles through tough spots, saving your fingers a lot of strain. These tools make a huge difference when you stitch a backpack.
Wax Your Thread (If Not Pre-Waxed)
If you’re using unwaxed nylon or polyester thread, consider running it through a block of beeswax a few times before you stitch a backpack. This coats the thread, making it stronger, more water-resistant, less prone to tangling, and easier to pull through fabric. It adds a layer of professionalism to your repair.
Finishing Knots and Sealing
Once you’ve completed your stitching, securing the ends is vital.
- Tie several tight knots right against the fabric, ideally on the inside of the backpack where they won’t show or rub.
- For synthetic threads (nylon, polyester), you can carefully trim the excess thread and use a lighter to melt the very ends. This creates a small, fused bead that won’t unravel. Be extremely cautious and practice this on scrap thread first to avoid burning your backpack!
- For added security and waterproofing, a small dab of fabric glue or seam sealer over the knots can provide an extra layer of protection.
When to Seek Professional Help
While this guide empowers you to stitch a backpack for many common repairs, some issues might be beyond a beginner’s scope. If you’re dealing with a broken main zipper, extensive structural damage, or very specialized technical fabrics (like those with waterproof coatings that need precise re-sealing), it might be worth taking your backpack to a professional outdoor gear repair shop or an experienced tailor. They have specialized machines and expertise for complex repairs.
Conclusion
Congratulations! You’ve learned how to stitch a backpack and are now equipped with the knowledge and techniques to tackle many common repairs. It’s truly empowering to know that you can extend the life of your gear, save money, and contribute to a more sustainable lifestyle with your own hands. Remember, every stitch you make is an act of care – for your backpack, your wallet, and the planet.
Don’t be intimidated by the first few attempts. With a little practice, your stitches will become neater, stronger, and more confident. Embrace the journey of learning and the satisfaction of seeing your favorite backpack brought back to life, ready for many more adventures. Happy stitching!
Frequently Asked Questions
How do I choose the right color thread for my backpack repair?
For an invisible repair, try to match the thread color as closely as possible to the backpack fabric. If an exact match isn’t available, choose a slightly darker shade, as it tends to blend in better. Alternatively, embrace a contrasting color for a unique, intentional design statement.
My backpack fabric is very thick. How can I push the needle through?
For very thick fabrics, use a thimble to protect your finger and apply pressure. If the fabric is still too tough, use an awl to create a small pilot hole before inserting the needle. Small pliers can also help you grip and pull the needle through from the other side.
Can I use a sewing machine to repair my backpack?
While a heavy-duty sewing machine (like an industrial or upholstery machine) is ideal for backpack fabrics, most standard home sewing machines may struggle with the thickness and layers. For most DIY repairs, hand-stitching with strong needles and thread often provides better control and sufficient durability.
What if the tear is on a curved part of the backpack?
Curved areas can be tricky. Use a curved upholstery needle to reach and stitch these areas more easily. For patches, make sure to cut your patch with rounded corners and manipulate the fabric gently to follow the natural curve while stitching.
How can I prevent my repair stitches from unraveling over time?
To prevent unraveling, always tie several tight knots at the beginning and end of your stitch line. For synthetic threads, carefully melting the thread ends with a lighter creates a secure, fused bead. A dab of fabric glue or seam sealer over the knots can also add extra protection.
My backpack is waterproof. Will my repair make it less waterproof?
Any needle penetration will create holes, potentially compromising waterproofing. For critical waterproof areas, use a seam sealer or waterproof fabric glue over your finished stitches on the inside of the backpack. Some professional repair shops also offer heat-sealing options for specific materials.